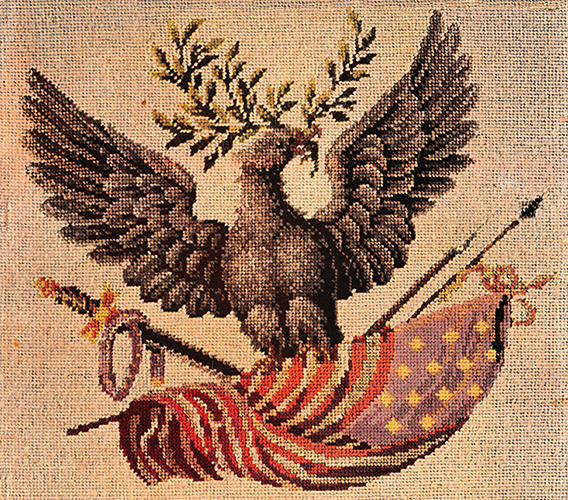
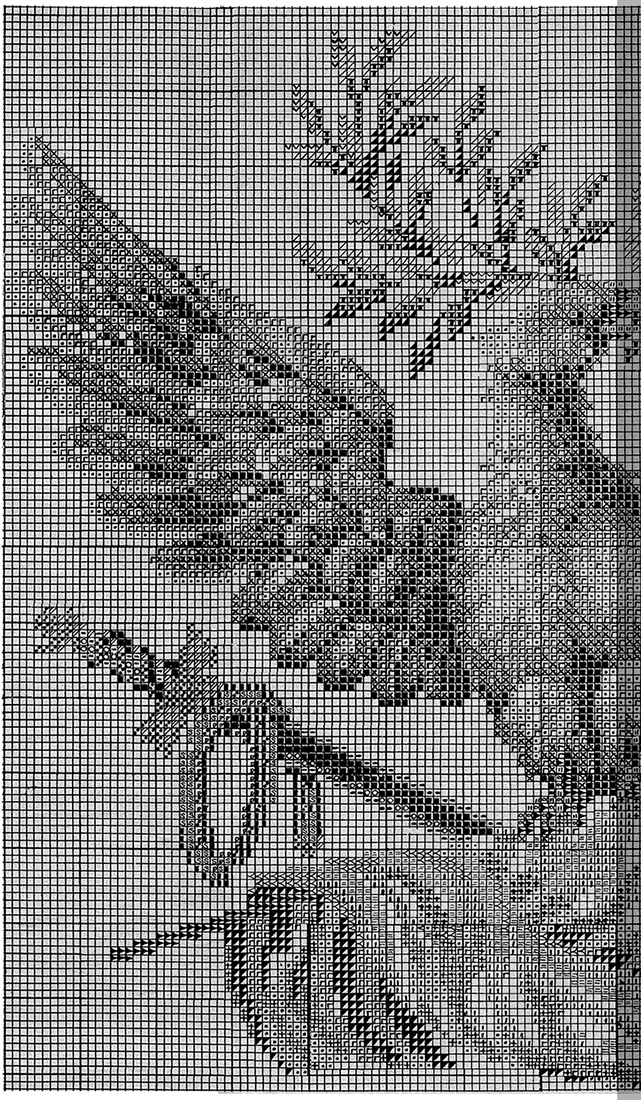
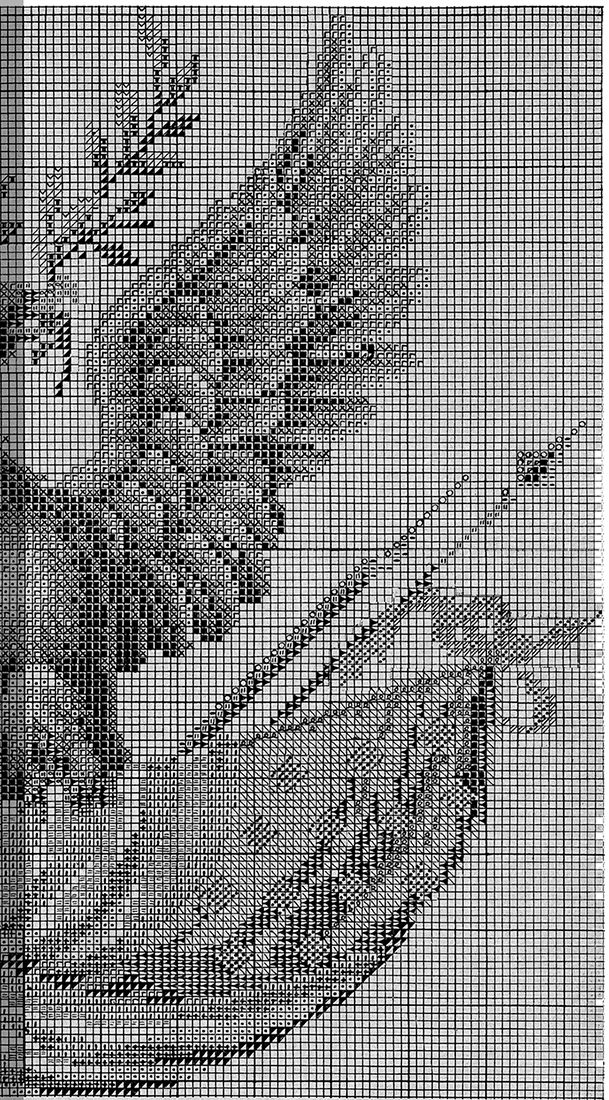
Embroider an Eagle

Needlepoint eagle, handsome heritage from the mid-nineteenth century—harmonious accent for period furnishings, touch of tradition for a modern room.
DIRECTIONS FOR NEEDLEPOINT PICTURE
MATERIALS: Ten mesh-to-the-inch canvas, 23" x 22½"; D.M.C. cottons and 12½ yd. skeins of tapestry wool in amounts given with color key; nineteen 40 yd. skeins of beige tapestry wool for background; tapestry needle; bias tape or heavy paper to bind canvas; picture frame, rabbet measure, 20" wide x 19½" high (size of embroidered background); ⅛" thick cardboard, ¼" smaller than rabbet.
DIRECTIONS: Bind edges of canvas with bias tape or heavy paper. Mark horizontal and vertical center lines on canvas as guides for placing eagle in center. Work eagle first, then background. Use either Continental or Diagonal Stitch. Cut working strands of wool about 18" long—wool cut too long will wear thin in working. Keep wool from twisting when working to avoid thin places in work. Fasten wool by going through stitches on back, then clipping ends close to canvas. To prevent work from getting crooked, be careful not to jerk wool tight—hold thumb on yarn until you have pulled it through canvas; then lift thumb, pull wool gently into place.
Blocking: Cover an old table, bread board or drawing board with brown paper and mark on this the size of canvas, being sure that corners are square. Place needlepoint, right side down, over guide and fasten with thumb tacks apart along edge of canvas. Wet thoroughly with cold water; let dry. If work is too badly warped to be pulled straight the first time, dry and re-stretch. Wet again, and dry.
Framing: Stretch canvas over cardboard backing, keeping lines of needlepoint straight. Hold in place with straight pins pushed into edge of cardboard. Begins pinning at centers of sides and at corners. Continue stretching and pinning until there is a border of pins about ¼" apart.


| Pattern Categories Browse the categories to help you find the patterns you're looking for. |
||


