 |
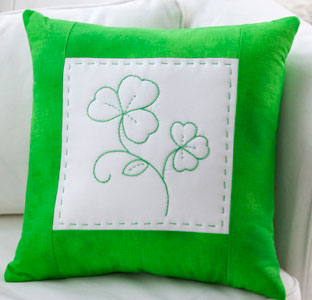
Shamrock Greenwork Pillow CS0101
Designed by: Cheryl Fall
Skill Level: Easy
This bright green embroidered pillow is a nice change of pace from the usual redwork or bluework!
Finished size of pillow: 12"x12"
Supplies:
• Coats Dual Duty XP All Purpose Thread to match border fabric - 1 spool
• J & P Coats Embroidery Floss - green to match border fabric - 1 skein
• White fabric or good quality white muslin, ½ yard
• Green fabric for border strips and backing, ½ yard
• Low loft batting ½ yard
• 12-inch pillow form
• Stitching Pattern
Cut:
• 1 square white fabric or white muslin 7½"x7½"
• 1 square batting 14"x14"
• 1 square muslin 14"x14"
• 1 square green fabric 12½"x12½"
• 2 strips green fabric 3"x7½"
• 2 strips green fabric 3"x12½"
Steps:
Note: All seam allowances are ¼ inch and are included in the given measurements.
1. Trace the quilting/embroidery design onto the square of white fabric.
2. Stitch the 3"x7½" strips to the sides of the white square. Stitch the two 3"x12½" strips to the top and bottom edges. Press seams outward.
3. Layer the pillow top with the batting and muslin. Pin-baste the layers together to prepare for quilting.
4. Cut a length of embroidery floss about 20 inches long. Separate it into 2 groups of 3 strands. Using stem or outline stitch, embroider/quilt the shamrock outlines and stems. Make sure you stitch through all 3 layers because you are quilting at the same time you are embroidering the design.
5. Stitch the leaf and shamrock details in running stitches. Repeat the running stitch ¼ inch from the border edges inside the white fabric square.
6. Using all purpose thread, stitch ⅛ inch from the raw edges of the pillow top. Trim away the excess batting and backing from the pillow top.
7. Stitch the pillow top to the green backing fabric, right sides together, leaving a 10-inch opening along the bottom edge for turning.
8. Clip corners close to but not through the stitching line. Turn the pillow covering right side out and press.
9. Insert pillow form and hand-stitch the opening closed to finish the project.
Pattern © by Coats & Clark Inc. Reproduced with permission from Coats & Clark Inc. PurpleKittyYarns.com is not endorsed by Coats & Clark Inc. It is not permissible to contract production of projects made from designs published by Coats & Clark to a third party for sale or distribution.
| Pattern Categories Browse the categories to help you find the patterns you're looking for. |
||
    
|
|
|


Navigation

All contents © 2003-2026 Purple Kitty LLC. All rights reserved.
Privacy Policy | FAQ | About Me