 |
Fantasy Fudge Recipe
Supplies Needed:
- 1 (one) 7 oz jar of Kraft marshmallow creme
- 1 12 oz. bag of semi-sweet chocolate chips
- 1 tsp vanilla extract
- 3 cups sugar
- ¾ c. (1 ½ sticks) margarine
- 1 (one) 5 oz. can of evaporated milk
- 1 cup chopped nuts (optional)
- 1 large bowl
- 1 large spoon
- 1 non-stick pan
- 1 spatula
- 1 13x9 pan
- Aluminum foil
- Cooking spray
- Wax paper
Step 1:
Line your 13 x 9 pan with aluminum foil and spray the pan with cooking spray. This makes cleanup easier and allows you to easily cut the fudge later.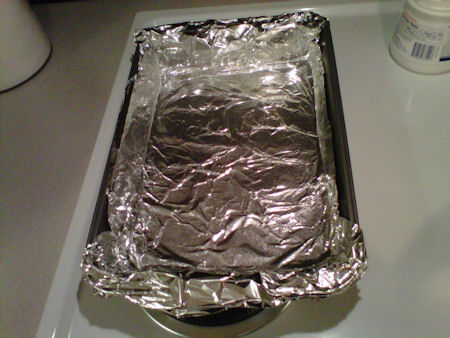
Step 2:
In a large bowl, combine marshmallow crème, chocolate chips and vanilla. Also add nuts, if desired. Combining these ingredients now simplifies the process of combining all the ingredients later on.

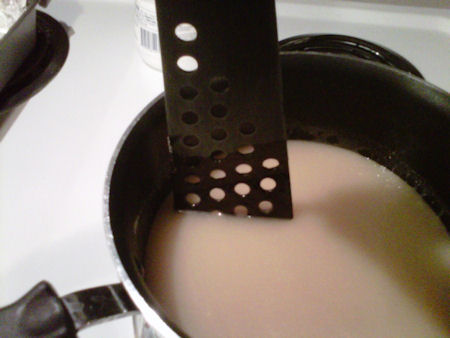
Step 3:
In your non-stick saucepan, combine the butter and milk on Medium heat. You can pre-melt the butter in the microwave but I just cut it into chunks to help it melt faster. After the butter and milk are well mixed, add in your sugar. Stir into butter/milk mixture and always be sure to keep your spatula on the bottom of the pan as much as possible.

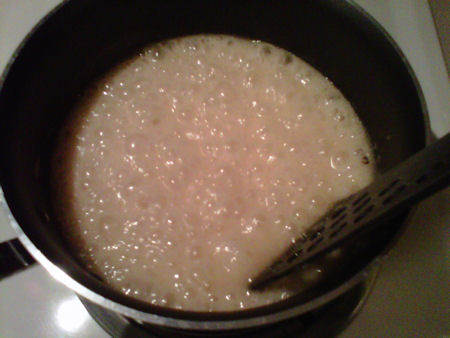
Step 4:
Once all three ingredients are combined into a liquid mixture, stir constantly. You can stir round and round, in a figure 8 motion, however you prefer … just keep the spatula on the pan’s bottom at all times. As you can see, I do the sides as well just to be sure.
Step 5:
Bring the mixture to a full rolling boil then set your timer! You want to boil the mixture for 5 minutes. The marshmallow crème jar says 4 minutes but I choose to boil mine for 5 minutes. Some people will drop a bit of the mixture into a cup of cold water and see if it turns into little balls. You’re welcome to try that. The more often you make Fantasy Fudge, the more you will be able to tell when it’s ready.
Step 6:
VERY carefully, pour your mixture into the large bowl with the other ingredients. Quickly yet carefully stir all the ingredients together. This step is actually one of the hardest as it takes some upper body strength.
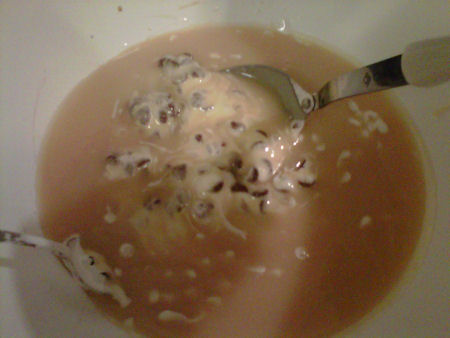
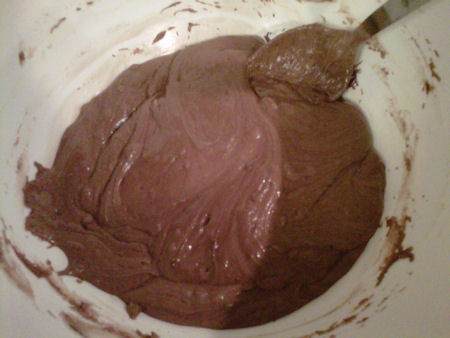
Step 7:
After you have combined all your ingredients, your fudge should look similar to the picture below (nuts were omitted).
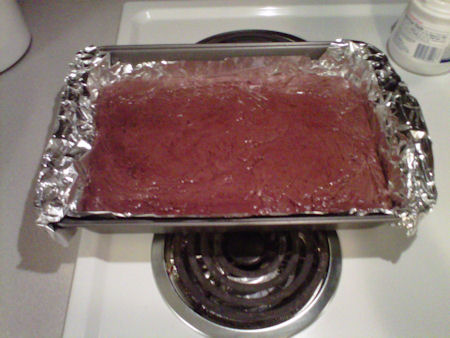
Step 8:
Pour your fudge into the pan you prepared earlier. Take your spoon and carefully push the fudge into the corners. Cover the pan with foil and place in the refrigerator for safe keeping and to ensure it hardens quickly.
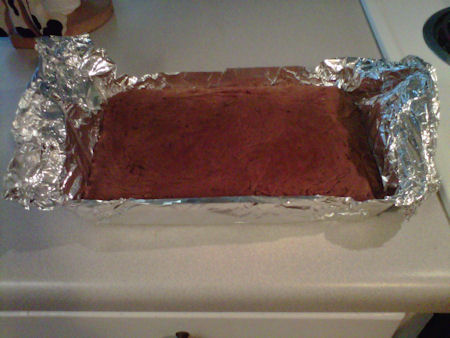
Step 9:
When you are ready to cut your fantasy fudge, lift the foil from the pan.
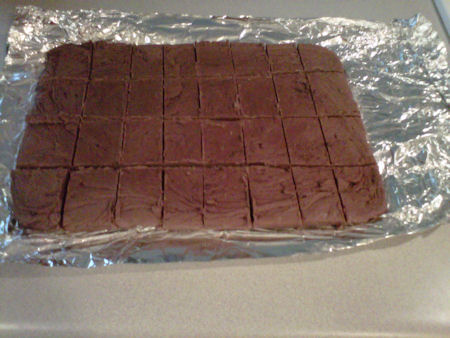
Step 10:
Cut your fudge in half then cut each section in half. Do this until you have small squares, approximately 1 inch in size.
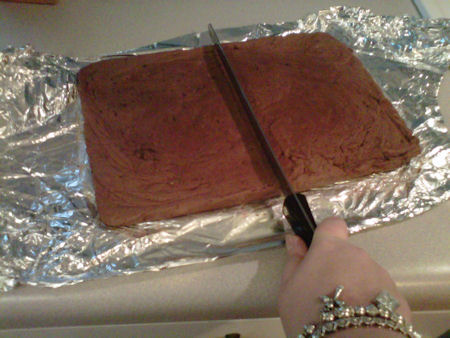
Step 11:
This fudge is rich so smaller squares are better. It’s easy for someone who wants more to grab a few pieces. :o)
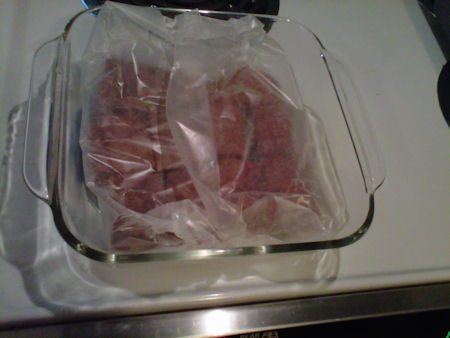
Step 12:
Line a container with wax paper and add your fudge piece by piece. Layer it with wax paper between the layers so that the fudge doesn’t stick together.
Step 13:
Cover with aluminum foil (reuse what you covered it with earlier) and put it back in the fridge.

Step 14:
Enjoy your fudge! If you master this dessert, you should be prepared to cook it often as your friends and family will love it! You can’t say you haven’t been warned. :o)
| Pattern Categories Browse the categories to help you find the patterns you're looking for. |
||
    
|
|
|


Navigation

All contents © 2003-2026 Purple Kitty LLC. All rights reserved.
Privacy Policy | FAQ | About Me