 |
Pumpkin Pincushions CS0079
Designed by Cheryl Fall
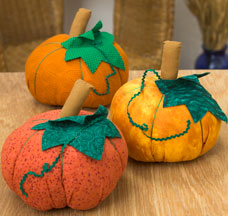
Decorate your table or mantle with our tomato-pincushion inspired Pumpkins. These decorations will look great throughout the entire fall season.
Finished size: Approx. 5 inches tall excluding stem. Instructions are given for one pumpkin.
SUPPLIES
• Dual Duty XP General Purpose in orange to match fabric
• Anchor Pearl Cotton or Red Heart Classic Crochet cotton - green, color 230
• Orange fabric, 16 x 16" square for pumpkin, 5" x 5" square for base
• Green fabric, 5" x 5" - 2 for leaf
• Brown fabric, 3" x 5" piece for stem
• Cardboard, 3" x 3" piece for base
• Baby Rick Rack, green, 12"
• Polyester fiberfill
• Double-side sheet adhesive (Peel & Stick for Fabric)
• Glue gun or quick-drying glue
STEPS
1. From the larger square of orange fabric cut a 12 inch diameter circle. Cut a 5 inch diameter circle from the smaller square.
2. Fold under ¼ inch around the edges of the large circle and sew a row of gathering stitches by machine or hand sew a running stitch around the edge. (For hand stitching use a double thread.) Pull thread so that the pumpkin body has about a 6-inch opening, do NOT secure the thread yet. Stuff the pumpkin body firmly. Pull the thread as far as possible to close the pumpkin.
3. Cut a 2" diameter circle from cardboard for base. Cut a 4" diameter circle from small orange square. Gather the 4 inch circle around the piece of cardboard for the base. Glue the base over the gathered area of the pumpkin. This will hide the gathers as well as provide a flat base so it won't roll.
4. Fold the strip of brown fabric in half, right sides together and stitch to make the stem. Turn the stem right side out and stuff. Gather the open end and close it.
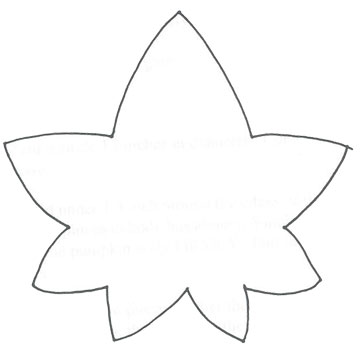
5. To make the leaf, trace the leaf pattern onto the paper side of the Peel & Stick. Peel away the plain side and place the sticky side on the wrong side of a green square. Cut out the leaf shape and remove the other paper backing. Stick to the wrong side of the second green square and cut out again.
6. Using a single length of pearl cotton and a long needle, place a knot at one end of the length of pearl cotton. Starting at the pumpkin bottom, near but not through the base, pull the needle through the body of the pumpkin coming out at the center top, and back through the bottom again, pulling tightly as you do this so the pumpkin develops soft-sculptured ridges. Repeat for 6 sections. Secure the thread at the base of the pumpkin.
7. Hot glue the stem, gathered side down to the top of the pumpkin. Glue the leaf near the stem.
8. Glue the rick rack in place on the pumpkin so it resembles a vine tendril.
Pattern © by Coats & Clark Inc. Reproduced with permission from Coats & Clark Inc. PurpleKittyYarns.com is not endorsed by Coats & Clark Inc. It is not permissible to contract production of projects made from designs published by Coats & Clark to a third party for sale or distribution.
| Pattern Categories Browse the categories to help you find the patterns you're looking for. |
||
     
|
|
|

|
Navigation

All contents © 2003-2025 Purple Kitty LLC. All rights reserved.
Privacy Policy | FAQ | About Me | Newsletters | Sitemap