 |
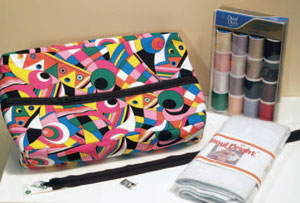
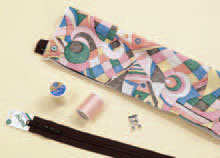
Insulated Casserole Carrier CS0024
Designed By Shannon Mullen
Designed for a 9" x 13" casserole. Adjust cutting dimensions for other sizes.
SUPPLIES
Husqvarna Viking Sewing Machine
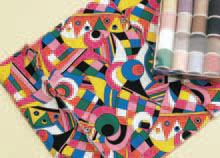
1 yard of frabric or ½ yard of fabric and ½ yard of lining
½ yard of Warm Co. Insul-Bright batting
One 22" Coats and Clark Purse Zipper
Coats and Clark Coordinating Colors of Sewing Thread
Iron
Rotary Tools
CUT
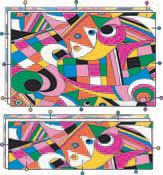
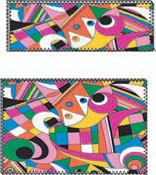
From Fabrics:
2 bottoms: 10" x 15
4 side pieces: 4" x 15"
2 tops: 10" x 22"
From Insul-bright:
2 side pieces: 3¾" x 15"
1 bottom: 10" x 15"
2 top pieces: 4¾" x 22"
All seam allowances are ¼" unless otherwise noted.
Thread with Coats and Clark sewing thread top and bobbin.
Snap on the "B" foot. Set your machine for a zig zag stitch, stitch length 3, stitch width 5. Layer two side pieces wrong sides together with Insul-bright batting between. Zigzag around the edges to zig zag the layers together and finish the edges.
Repeat for other side pieces and bottom pieces.
Place one 4¾" x 22" Insul-Bright top piece on the wrong side of one 10" x 22" top piece.
With the right side of the zipper down on fabric side, place the zipper along the 22" edge matching the raw edges. Pin. Wrap the other right side of the top fabric to the wrong side of the zipper encasing the zipper and matching the raw edges of the fabric. Snap on the "A" Foot.
Select left needle position straight stitch, length 3. Stitch along the raw edge stitching the zipper between the fabric layers and Insul-Bright on the underside and zigzag the edge to finish it.
Turn right side out and press Repeat for other side of the top of the casserole cover to sew the other side of the zipper in place. Your top is done.

Place the 15" edge of the side pieces along the 15" edge of the bottom pieces right sides together. Straight stitch the seam. Press the seam open.
Center one top piece along the side. Pin top in place. Stitch to the side starting ½" in from the side and ending ½" away from the end.
Make slit in the corner of the top piece about ¼" into the top so that the piece can bend easily. Continue sewing the top piece down the side. Repeat this process until all four top corners are sewn.
Stretch out the bottom. Stitch the top onto the bottom stopping for the zipper teeth and reinforcing before and after. Zigzag any unfinished edges and turn right side out. Fill with your favorite dish and go!

Pattern © by Coats & Clark Inc. Reproduced with permission from Coats & Clark Inc. PurpleKittyYarns.com is not endorsed by Coats & Clark Inc. It is not permissible to contract production of projects made from designs published by Coats & Clark to a third party for sale or distribution.
| Pattern Categories Browse the categories to help you find the patterns you're looking for. |
||
     
|
|
|

|
Navigation

All contents © 2003-2025 Purple Kitty LLC. All rights reserved.
Privacy Policy | FAQ | About Me | Newsletters | Sitemap